


Discover the unique beauty of the anti-helix piercing, located on the inner part of the ear cartilage. This choice allows you to create a refined and trendy “triple piercing” effect. Take the time to properly plan your project, choose a qualified piercer, and follow strict hygiene practices. The pain remains manageable, and healing is easy to manage with proper advice. Don’t hesitate to consult a professional to ensure your piercing is successful.
Key Points
Choose a qualified piercer to ensure the safety and success of your piercing.
Follow strict hygiene practices before and after the piercing to prevent infections.
Prepare yourself mentally and physically for a positive experience during the piercing.
Monitor the signs of healing and consult a professional if in doubt.
Opt for hypoallergenic jewelry for optimal comfort and to avoid complications.
Preparing for an Anti-Helix Piercing
Choosing the Right Piercer
You must choose a qualified piercer to ensure the success of your anti-helix piercing. An experienced professional will put you at ease and follow all hygiene rules. Here are a few criteria to check:
Check the piercer’s experience and ask how long they have been practicing.
Observe the cleanliness of the piercing studio. A clean environment reduces the risk of infection.
Choose studios known for their professionalism and quality of service.
Make sure the salon displays its certifications and that the piercer holds recognized qualifications.
Check that they are a member of a professional federation, which guarantees compliance with current standards.
A good piercer will take the time to answer your questions and explain each step.
Hygiene and Disinfection
Good hygiene is essential before getting an anti-helix piercing. You must prepare your skin and ear to minimize risks. Here are the steps to follow:
Wash your hands with a saline solution before touching the area.
Clean the area to be pierced with a sterile gauze pad, never with cotton.
Use a suitable disinfectant such as Diaseptyl® or Easy Piercing®.
Rinse the soap thoroughly with warm water or sterile saline solution.
Avoid swimming pools and beaches for the first few months.
Tip: Never use an alcohol-based solution, as it can irritate the skin.
Preparing Your Ear and Expectations
Prepare yourself mentally and physically before the day of your anti-helix piercing. Here are a few tips for a positive experience:
Get plenty of rest the day before and drink enough water.
Avoid alcohol and drugs before the session.
Ask to see the sterile needle in its packaging.
Check that the piercer wears sterile gloves.
Lie comfortably on a sterile sheet.
You can also discuss the “triple piercing” effect with your piercer to personalize your project according to your preferences.
Procedure and Pain
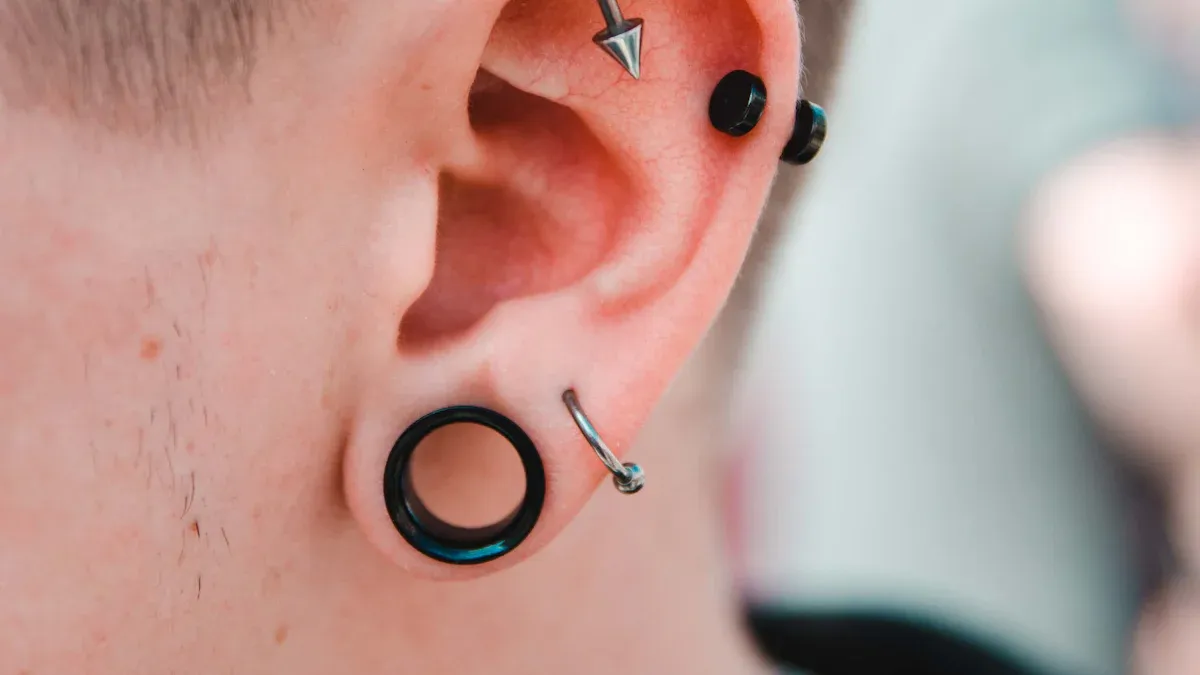
Steps of an Anti-Helix Piercing
Want to understand how an anti-helix piercing is done? Here are the main steps your piercer will follow:
They begin by carefully cleaning the anti-helix area with an antiseptic solution.
They mark the exact spot where they will pierce using a surgical marker.
They use a hollow, sterilized needle to perform the piercing.
They immediately insert the chosen jewelry into the new hole.
Each step is designed to ensure your safety and minimize the risk of infection. You can ask the piercer to explain each action to reassure you.
Managing Pain
You are probably wondering if an anti-helix piercing hurts. Many people rate the pain at 5/10. It remains moderate, similar to other cartilage piercings. The sensation depends on your pain tolerance and the piercer’s experience.
Several methods exist to help manage the pain:
The piercer handles the needle gently and precisely.
They insert the jewelry quickly to reduce discomfort.
Sometimes, they will talk to you to distract you during the procedure.
After the piercing, you can apply a cold compress or use a soothing oil such as tea tree oil.
If necessary, you can take an over-the-counter pain reliever.
Tip: Avoid touching or handling the jewelry too often so as not to irritate the area.
Immediate Post-Piercing Advice
After the piercing, you must adopt good habits to prevent infections:
Clean the pierced area twice a day with a sterile saline solution.
Always wash your hands before touching your ear.
Limit direct contact and do not handle the jewelry unnecessarily.
Take care of your new piercing from the very beginning to promote quick, trouble-free healing.
Healing
Duration and Key Stages
You should know that an anti-helix piercing takes time to heal. Generally, it takes between 6 and 8 months. Sometimes, it can take up to a year, especially if you do not follow the recommended aftercare or if your body heals more slowly. Several factors, such as genetics, age, and the quality of care, influence this duration.
Here are the three main stages of healing:
Inflammatory phase (days 1 to 7)
Your body reacts to the piercing. You will often notice inflammation, redness, pain, and slight swelling.Proliferation phase (weeks 1 to 6/8)
Cells multiply to close the wound. Granulation tissue forms around the jewelry.Maturation phase (months 2 to 12)
The skin restructures itself. The piercing channel thickens and becomes stronger.
Tip: Clean your piercing with a sterile saline solution twice a day throughout the entire healing period. This simple step helps prevent infections and promotes proper healing.
Normal Signs and Warning Signs
During healing, you will notice certain signs that everything is going well. You may notice:
Slight swelling around the piercing
Moderate redness
A small clear or yellowish discharge (lymph)
The formation of thin scabs
These reactions are normal, especially during the first few weeks. They are part of the natural healing process.
However, you must remain vigilant. Certain signs should alert you:
Intense or persistent pain
Spreading redness or excessive heat
Thick, greenish, or foul-smelling discharge
The appearance of keloids (small hard bumps) or infections
If you notice any of these symptoms, consult a piercing professional or doctor promptly.
Factors Affecting Healing
Several elements play a role in the speed and quality of healing:
Piercing location: The anti-helix cartilage receives less blood flow than the lobe. This can sometimes slow healing.
Post-piercing care: Regular cleaning with a saline solution and following your piercer’s advice remain essential.
General health: A balanced diet, proper hydration, and a healthy lifestyle promote quick healing.
Lifestyle habits: Avoid sleeping on the pierced ear, handling the jewelry, or going to swimming pools and beaches during the first few months.
Tip: The better you take care of your piercing, the more you reduce the risk of complications and speed up healing.
Daily Care
Cleaning and Care
You must take care of your anti-helix piercing every day to prevent infections. Here are the essential steps to follow:
Clean the piercing morning and evening with a saline solution or a gentle cleanser.
Use a gentle soap if necessary, but rinse the area thoroughly.
Apply the solution around the jewelry with a cotton swab or sterile gauze pad.
Always wash your hands before touching your ear.
Be careful around bumps and avoid snagging the jewelry.
Tip: Never use products containing alcohol or harsh chemicals. This can irritate the skin and slow healing.
Mistakes to Avoid
Certain mistakes can delay healing or cause complications. You must avoid them to keep your piercing healthy:
Do not use unsuitable products for cleaning.
Do not choose poor-quality jewelry.
Do not neglect the healing phase, even if the area appears healed.
Do not swim too soon after the piercing.
Do not underestimate the importance of follow-up with a professional.
Note: Poorly suited jewelry or improper care can lead to serious problems.
Managing Complications
Complications can occur, even with proper care. You should know how to react:
If you notice bleeding, apply gentle pressure with a clean gauze pad.
If the area becomes red, painful, or swollen, clean it with a gentle saline solution.
Avoid rubbing, bumps, and butterfly-back jewelry.
Monitor for signs of infection, such as thick discharge, persistent pain, or excessive heat.
Consult a professional promptly if you notice an abnormal reaction.
Take care of your piercing every day to enjoy optimal healing and a long-lasting aesthetic result.
Choosing Anti-Helix Jewelry
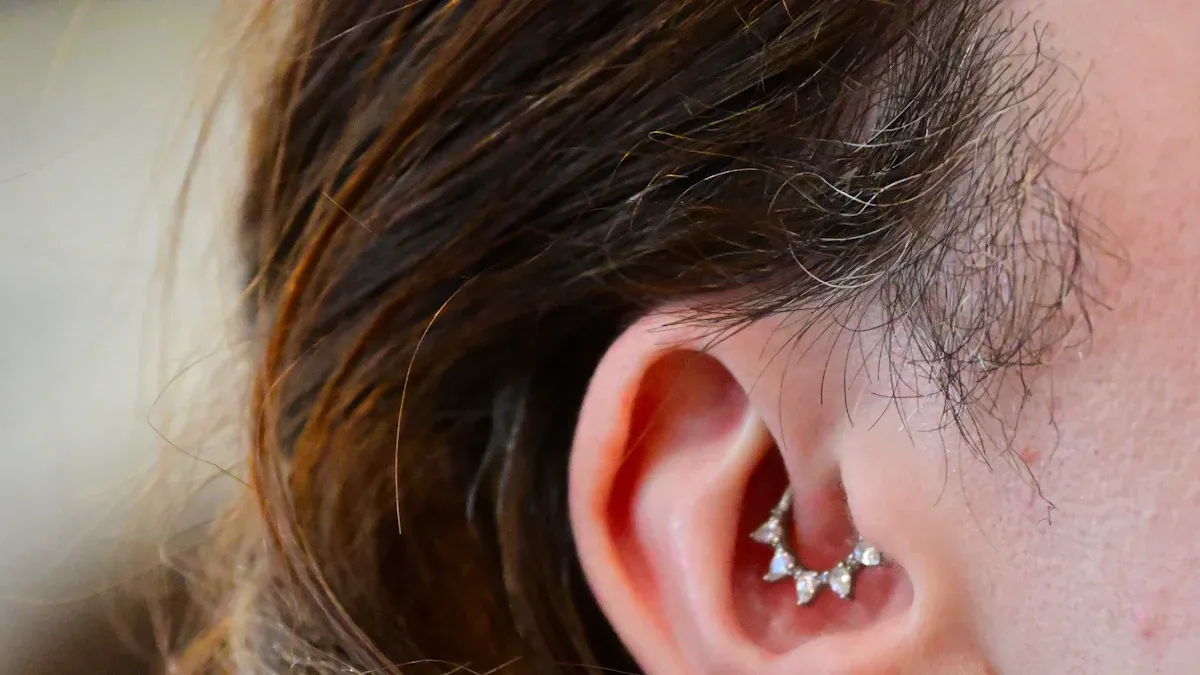
Curved Bars and Rings
You must choose jewelry suited for your piercing anti-helix. Two main shapes exist, each with its advantages:
Curved bars make healing easier. They limit friction and reduce the risk of irritation.
Rings, including segmented models, offer a modern style and adapt well to the shape of the cartilage.
You can also find jewelry made of bioflex, surgical steel, titanium, or gold. These materials are suitable for most ears.
Tip: Start with a curved bar during the healing phase, then explore rings to vary your style.
Hypoallergenic Materials
Choosing the right material remains essential to avoid allergic reactions. You should favor the following hypoallergenic options:
Titanium: lightweight, resistant, and nickel-free, it is suitable for sensitive skin.
Gold: elegant and hypoallergenic, it adds a touch of luxury.
Bioplastic: made from renewable plant-based materials, it is gentle on the skin and the environment.
Titanium remains often the number one choice for sensitive people. It does not cause irritation and ensures optimal comfort.
2026 Trends
In 2026, the anti-helix piercing is establishing itself as an ultra-trendy accessory. You can create a chic and glamorous effect by aligning several pieces of jewelry along the inner fold of the cartilage. Rows of precious stones or colored crystals add originality and refinement to your ear.
Minimalist designs remain popular.
Jewelry adorned with precious stones or geometric patterns is becoming increasingly appealing.
You can personalize your look by combining different styles and colors.
Tip: Imagine a unique composition to enhance your anti-helix and follow the latest trends.
Budget and Changing Jewelry
Prices in 2026
Want to know the price of an anti-helix piercing in 2026? The price varies depending on the salon and the city, but you can rely on the national average. Here is a table to help you understand better:
Piercing type |
Price (euros) |
|---|---|
Anti-helix |
This price often includes the piercing procedure and the initial jewelry. Several elements can influence the total cost:
The type of jewelry chosen
The location where you get the piercing done
💡 Tip: Investing in quality materials guarantees the durability and comfort of your piercing.
When and How to Change Your Jewelry
You must wait until it has completely healed before changing your anti-helix jewelry. This process generally takes between 6 and 12 months. It is important not to rush this change to avoid irritation or infection.
Wait until the area has completely healed.
Book an appointment with a professional piercer for the first jewelry change.
Once it has completely healed, you can personalize your look with new jewelry.
Changing your jewelry too soon can cause complications. Be patient and prioritize safety.
Tips for avoiding complications
To change your jewelry safely, you must take a few precautions:
Check that it has completely healed (6 to 12 months).
Choose hypoallergenic jewelry such as titanium, surgical steel, or gold.
Always disinfect the new jewelry before inserting it.
Ask a professional to perform the change if you have any doubts.
🛡️ Tip: Taking care at every step protects you from infection and preserves the beauty of your anti-helix piercing.
Practical tips
Healing tips
To help your anti-helix piercing heal quickly and without complications, you should adopt good habits.
Here are a few simple tips to follow:
Allow between 6 and 8 months for complete healing.
Avoid sleeping on the pierced ear to reduce irritation.
The less you touch the piercing, the better it will heal.
Take factors such as genetics, age, and stress into account, as they influence the healing speed.
You can also follow these steps:
Do not touch the piercing with dirty hands.
Avoid snagging it on clothing or earphones.
Do not sleep on the pierced area.
Tip: The more you leave your piercing alone, the faster and more smoothly it will heal.
What to watch for
During healing, you should check your ear every day.
Here is what you should watch for:
The skin around the piercing should remain normal or slightly red at first.
Slight swelling or a small scab is normal.
The pain should decrease over time.
If you notice that the pain increases or the area becomes very red, it may indicate a problem.
Stay alert to any unusual changes.
When to consult a professional
Certain signs indicate that you should seek professional advice.
Be vigilant if you notice:
Pain that increases instead of decreasing.
Intense redness or marked warmth around the piercing.
Significant swelling that does not go away.
Thick, yellowish, or greenish discharge with a bad odor.
Fever or general malaise.
Do not wait if you have any doubts. A professional will know how to help you protect your health and your piercing.
To ensure your anti-helix piercing is a success, you should remember these key steps:
Prepare carefully.
Maintain strict hygiene.
Choose a qualified piercer.
Follow the recommended aftercare.
Opt for suitable jewelry.
Do not hesitate to consult a professional if you have the slightest doubt. You can personalize your piercing according to 2026 trends. Make safety the focus of your experience so you can fully enjoy your new look.
FAQ
How long does it take for an anti-helix piercing to heal?
You should allow between 6 and 12 months for complete healing. Take care of your piercing every day to avoid complications.
Can I sleep on my pierced ear?
You should avoid sleeping on your pierced ear. This reduces the risk of irritation and promotes better healing.
What products should I use to clean my piercing?
Use sterile saline solution or a gentle cleanser. Never apply alcohol or harsh products to the area.
Is an anti-helix piercing painful?
You will feel moderate pain, often rated 5/10. The sensation is brief and manageable. An experienced piercer will help you relax.
When can I change my jewelry?
Wait until it has completely healed, which is 6 to 12 months. Ask your piercer for advice before changing the jewelry to avoid any risk.


